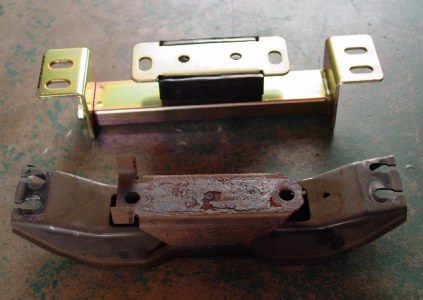
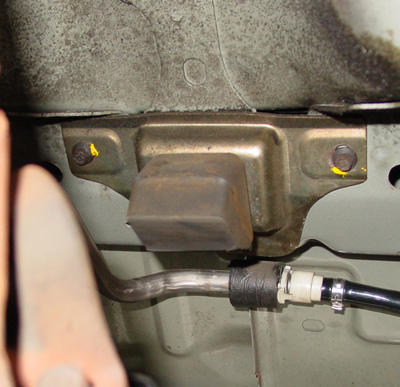
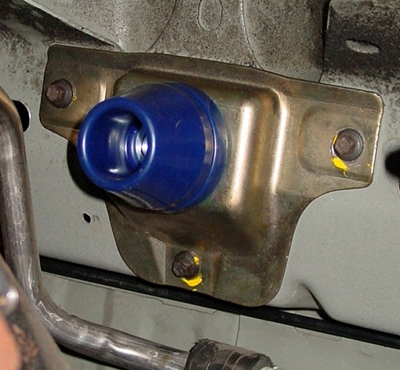
Bump Stop
Saleen cuts the stock bumpstop when they lower the vehicle, but I prefer one made especially for lowered vehicles. Stock cut one is on the left.
Windage Tray and Oil Pan
While I was installing the K-member I took the opportunity to install a Canton oil pan and windage tray. The pan is baffled and has trap doors to keep oil at the pick-up under all circumstances. The pan also holds 7 quarts of oil opposed to the stock 5 quart pan. A windage tray keeps the windage around the crank from the oil in the sump area. It allows the oil coming off the crank to easily enter the sump without the windage affecting the oil already in the sump. A good windage tray also keeps the oil in the sump from getting into the rotating assembly when the action of the vehicle is in motion. All of this adds up to a few extra ponies.
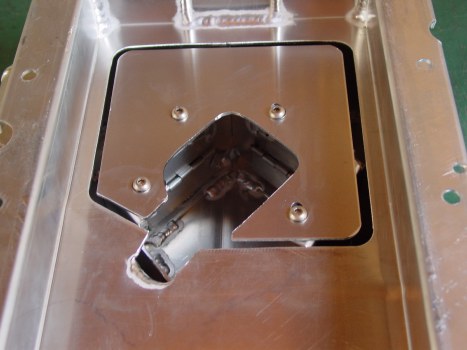
Inside the sump of the pan. You can see two of the trap doors.
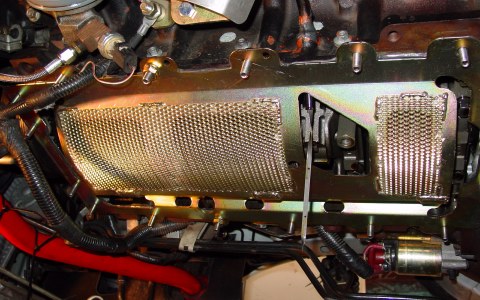
Here's the windage tray before I put the pan on. You can see the dipstick poking out. The oil pick-up was removed here in order to install the tray.
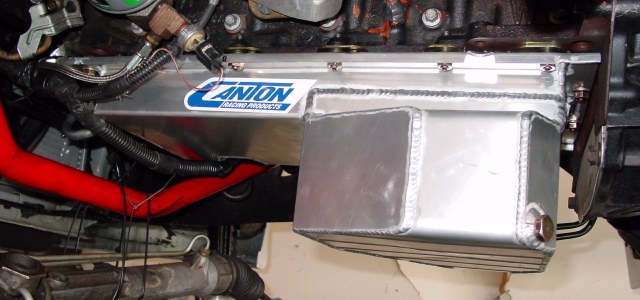
Here's the pan installed. The K-member is off in this picture.
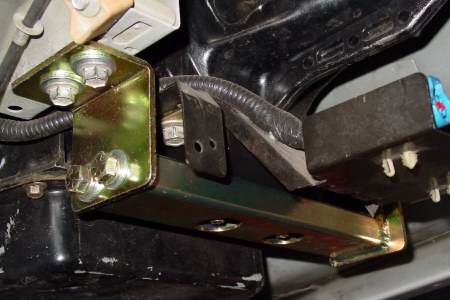
Bushings & Mounts
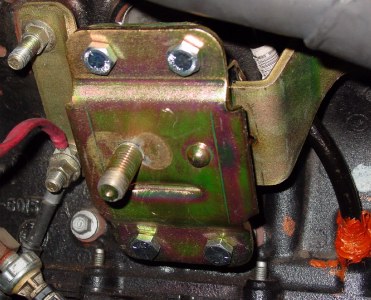
When I installed the K-member I took the opportunity to add Prothane polyurethane motor mounts.
I also installed a polyurethane transmission mount. It's a lot beefier than the stock mount and will last forever.
So it's an automatic...

After 2 years of owning the car, the 4R70W decided it was being asked to do too much and broke. At first I hoped it was something I could fix so I dropped the pan, pulled the valve body and shift actuators, and thoroughly cleaned everything. While the bottom of the tranny was apart I decided to perform the famous "Jerry's mods" listed on the TCCoA web site. The shift kit mods are relatively simple to perform. I replaced all the sensors and actuators just in case they had been the reason my transmission had died. My parts list included the following:
 |
|
2.7 OD servo (F75Z-7H188-AA) |
|
|
OD return spring (F2VY-7F201-A) |
|
|
Reverse servo (E0AZ-7D189-A) |
|
|
1-2 accumulator piston (F7AZ-7F251-AA) |
|
|
1-2 return spring (F75Z-7F284-BA) |
|
|
1-2 accumulator cover (F4AZ-7F247-A) |
|
|
2-3 accumulator piston (F7AZ-7H292-AB) |
|
|
Separator gaskets (XW7P-7D100-AA) and (1L3Z-7C155-AA) |
|
|
EPC high pressure solenoid (XL3Z-7G383-AB) |
|
|
Torque converter clutch solenoid (TCC) (F8AP-7G136-AA) |
|
|
Shift control solenoids (SCS) (F8AP-7G484-AA) |
Drill Bits
|
|
0.100 (#39 bit) |
|
|
0.125 (1/8" bit) |
|
|
0.160 (#20 bit) |
|
|
0.180 (#15 bit) |
|
|
0.238 (B bit) |
|
I drilled my separator plate holes as follows (hole number relates to the picture on the TCCoA web site): |
|
|
#1 - 0.160" |
|
|
#2 - 0.125" |
|
|
#3 - 0.180" |
|
|
#4 - 0.125" |
|
|
#5 - 0.125" |
|
|
#6 - 0.160" |
|
|
#7 - 0.125" |
|
|
#8 - 0.238" |
|
|
#9 - 0.100" |
|
|
#10 - 0.100" |
|
|
#11 - 0.100" |
|
In addition I opened the slot on the gasket to 0.100" wide and opened the gasket holes up around holes #4 and #5. |
Unfortunately all that work didn't fix my problem, something in the top of the tranny had broken. Since I couldn't drop my tranny in my garage and fix it myself I trailered the car to California Performance Transmission (formerly Art Carr) in Huntington Beach for a full rebuild. They rebuilt the 4R70W as follows:
|
|
Opened up the pump feed holes for better lubrication |
|
|
Blocked of the second gear accumulator |
|
|
Blocked off the third gear accumulator |
|
|
Rebuilt high gear with 8 red frictions and koleen steels (stock is 6) |
|
|
Rebuilt forward gear with 5 red clutches and koleen steels (stock is 4) |
|
|
Rebuilt intermediate clutch with 5 red clutches and koleen steels (stock is 4) |
|
|
Replaced overdrive band with high pro friction red band |
|
|
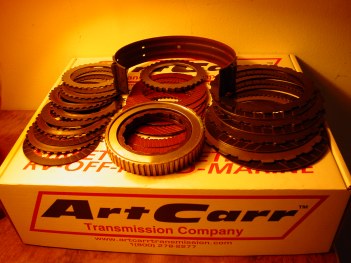
Installed valve body shift kit |
Here you see stock pieces that were replaced
The entire package was wrapped up, dyno tested, and warrantied. The car shifts like a hammer now and chirps the tires on the shifts. I couldn't be happier. I had always considered putting a manual into the car, but after shift kitting the tranny and having it built to race car specs, I'll never swap over.
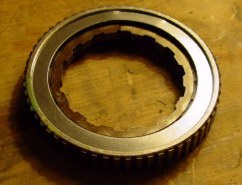
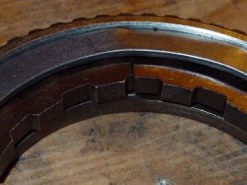
Here's some pictures of the broken intermediate one-way clutch, the root of all my problems.
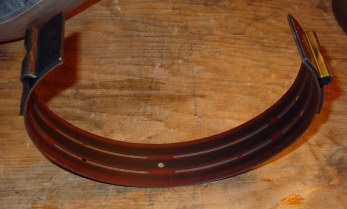
This is the stock OD band. Notice that it is burnt.
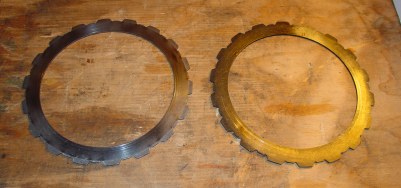
It is difficult to tell in the picture, but most of my steels from the clutch packs were totally fried. It takes a lot of heat (from friction from the slipping clutches) to permanently discolor steel. The steel on the right is almost black, the left is very silver (like it should be). The light in my garage is a little misleading.
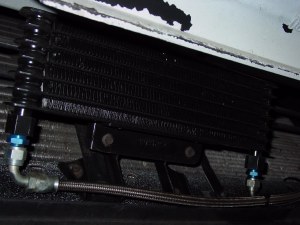
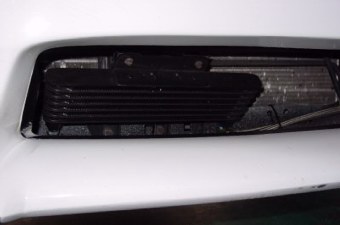
Tranny Cooler
With all the horse power the motor is making and the additional heat generated by the aftermarket torque converter, a lot of stress is put on the tranny. To help lengthen fluid and transmission life I added an FRPP plate/fin tranny cooler and installed it using braided steel hose. I didn't trust that rubber hose the kit came with. The braided line will also help maintain line pressure since it won't flex and expand like a rubber hose would.
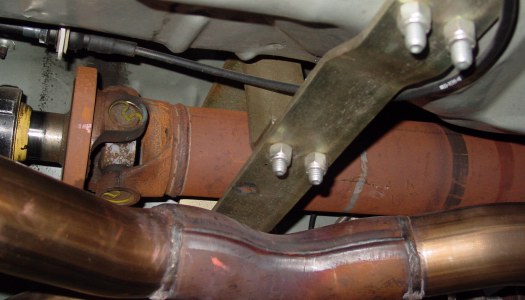
Driveshaft Loop
I bolted on an HPM driveshaft safety loop (see picture above). This piece of hardware encircles the driveshaft and keeps it from 1) destroying the underside of the car and 2) catapulting the car into the air in case the driveshaft snaps. It is also required by the NHRA for cars with slicks running 13.99 or faster, or cars with street tires running 13.00 or faster. Either way, I needed one.
Rear End
Along with the blower, the previous owner was kind enough to install an 8.8 girdle system in the rear. This serves to strengthen the rear-end in order to handle all the power. A Precision Industries torque converter was also added to handle the additional power from the blower. The stall speed is around 2200 to 2400 rpms, which is perfect for a street-driven blower car. You want your stall speed to be right around the point where the car's torque curves starts to increase sharply, and for blower cars this is in the lower 2000s.
|